Whether you use your car every day, once a week or only bring it out for your local motor club’s annual summer show, keeping your vehicle clean and tidy is a must - and it’s an important part of regular car maintenance too. Here’s why.
Cars have a tough life. Millions of them are fired up and driven every day, in the baking sun and the freezing cold. On dusty country lanes and rain swept motorways.
And when they are not being thrashed up and down the highway, they’re carrying the shopping, taking a boot load of rubbish to the local tip, picking up the children from school and acting as a makeshift restaurant when you and your family stop for a quick drive-through burger.
Every second of every minute of every day your car is getting dirtier and dirtier. And with that filth and grime comes germs, microbes and bacteria.
Giving your car a wash and clean – a valet – on a regular basis is not only good for its looks. It’s good for its hygiene too. Vitally important in fact.
Taking it for a professional once-over is one way of solving the problem. But that can cost upwards of £30 every time you pull over for a wash and scrub up. But giving your vehicle a clean yourself is a much cheaper option. So how do you valet your car at home? Here are Motorcheck’s top tips for a tip-top car.
What you’ll need for at-home car cleaning:
- Hose
- Bucket
- Sponge
- Brush
- Microfibre cloth
- Car shampoo
- Car wax
- Glass cleaner
- Fabric cleaner / leather polish
- Vacuum cleaner
Step 1 – Rinse & pre-wash the car exterior
Don’t just plunge a sponge into a soapy bucket and get scrubbing. Your car’s bodywork will be covered in tiny particles of dust and grit and you will simply be pushing those into the paintwork. Start wetting the roof and work your way around the car, down to the wheels, giving everything a good soaking.
Step 2 – Apply car shampoo to remove dirt & grime
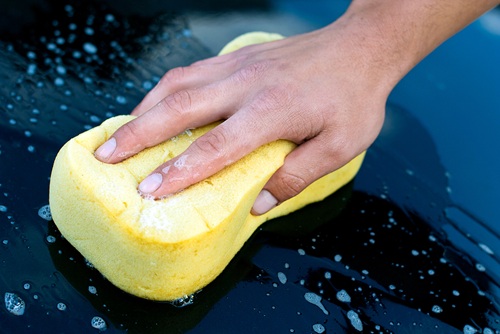
Follow the same pattern with the application of the car shampoo. There are hundreds to choose from in car DIY shops and they give everything a good lathering to lift dirt and grime. Make sure the windows are well washed and don’t forget your side mirrors. Get as low as you can under the car without actually scrubbing the underside. And use a small brush to get in among the nooks and crannies of your alloy wheels.
Step 3 – Rinse off shampoo for a spot-free finish
Starting again with the roof, work your way down the car rinsing everything well with clean water from a hose or fresh bucket of water and a clean sponge. The water falling from the roof is already rinsing the doors and wheels by the time you reach them, so everything is well washed and there’s little waste of water.
Step 4 – Dry the car to prevent water spots
Don’t leave the car to ‘air dry’. It will end up covered in water spots, especially on the glass. Use a clean drying towel or microfibre cloth to go over the whole car, removing water. Some people like a chamois leather, but synthetic microfibre cloths are excellent for picking up moisture. Use a separate cloth to dry wheels as these are likely to still hold small grit and brake dust particles.
Step 5 – Apply car wax for long-lasting shine
There is no need to wax or polish your car every time you wash it, as good quality waxes last for weeks. Once every six months should be sufficient. Apply the wax according to the product’s instructions, leave for a few minutes, then remove with another cloth.
Step 6 – Vacuum the interior & boot area
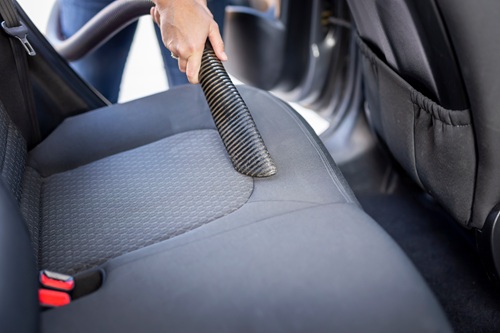
First things first – get the suction cleaner in there and give everything a good hoover out. That’s the carpets, floor mats, seats, oddments and drinks holders and in between the seat base and seat back. Don’t forget the boot area, which takes a lot of punishment from dirt, and the parcel shelf if your car has one. Slide seats fully forward and fully backwards as you go to ensure you are covering all areas.
Step 7 – Remove fabric stains & clean leather trim
Stubborn stains on the seat fabric or tiny footprints on the backs of front seats might need extra attention. Use a damp cloth or specialist solution to tackle these. Leather seats and trim will also require a cleaning product made especially for this material.
Step 8 – Wipe interior surfaces & clean glass
Plastic trim areas can be wiped down with a cloth and even air vents shouldn’t be ignored – use a soft brush such as a toothbrush to get in there. The inside of doors can get muddy and will need a wipe, while instrument panels can be transformed with a damp cloth. Make sure the steering wheel is wiped – these have been proven to harbour all sorts of germs. Wipe all glass from the inside to remove marks and smears and improve vision.
Final car cleaning tips & maintenance reminders
Work in the shade, not sunlight, if possible as this helps prevent cleaning products, and water, drying too quickly.
Use separate cloths for different jobs – shampooing, rinsing, wheels, interior.
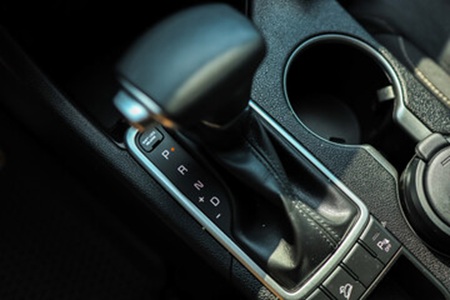
Spend time on the details such as door handles, headlight lenses and interior elements like the gear knob and switchgear.
Stand back and admire your handiwork. Checking on your car from different angles will reveal if you have missed anything.
After that, clear away and enjoy another few hundred miles of clean, hygienic motoring!
You’ve taken the time to clean and care for your car - now take the same care when buying one. Check the history of any second-hand car with MotorCheck before you buy.
 by
by